9 Marketing Automation Trends to Watch in 2022
March 8, 2022
The 5 Digital Marketing Trends You Shouldn’t Miss in 2022
March 23, 2022Your company has a backstory. A one-of-a-kind story. A story that people are interested in. This is a story that must be told. LIVE! In front of hundreds of people who are watching! But we know what's holding you back because we've been there!
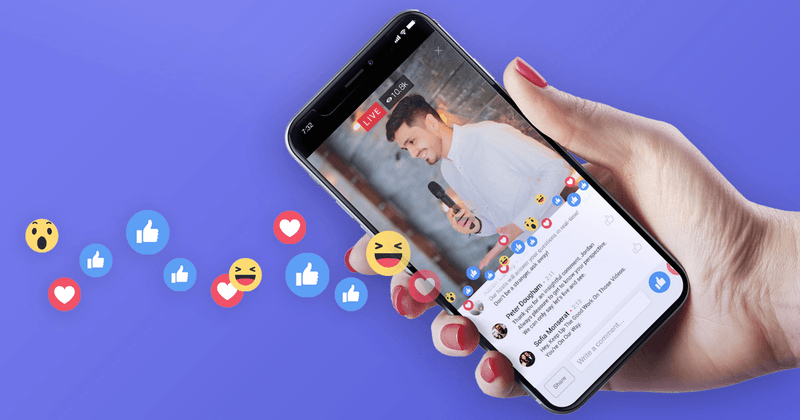
That's why, in this article, we answer the questions you've been too afraid to ask, so you can learn how to create professional TV-quality live streams for Facebook without spending a fortune at a TV studio.
Ready? Let's get started!
1. What Is Facebook Live, Exactly?
Facebook Live allows you to communicate with your audience in real time. You can go live from your mobile or desktop, and you can control who can watch your broadcast. It is an excellent tool for engaging your audience in events and conversations that are important to you.
2. How Do You Go Facebook Live From Your Phone?
Live video streaming from your mobile device is extremely convenient and is becoming more common. You can go live from anywhere at any time and share your real-time perspective with your audience. Here's a step-by-step guide to help you get started.
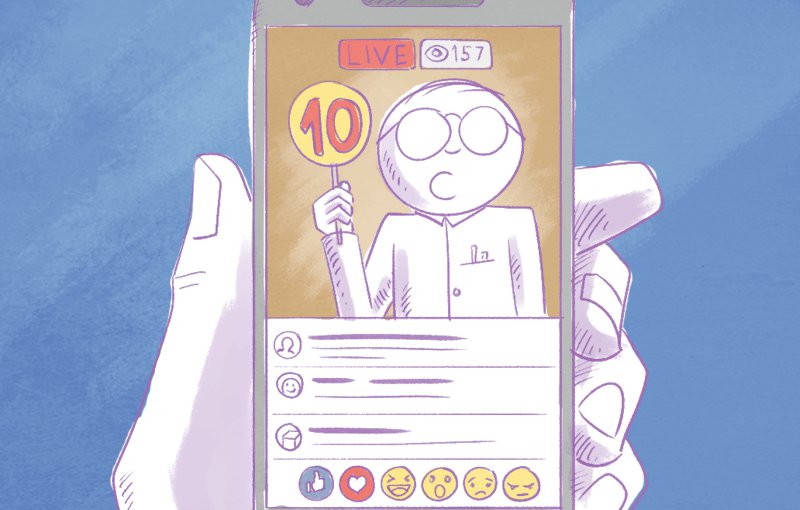
Step 1: Open the Facebook app on your mobile device and scroll through your newsfeed.
Step 2: In the extreme left corner, just below your status update bar, there is a "live" button. Find that button and click on it.
Step 3: As soon as you press the "live" button, Facebook will request access to your microphone and camera. This is done to ensure that Facebook has your permission to stream your audio and video. To proceed, you must grant Facebook these permissions.
Step 4: In the top left corner, there's a "to" option that lets you choose who can see your live. In your status update bar, there is a "live" button. Find that button and click on it.
Step 5: As a brand, you'd like more people to be able to see your live stream. As a result, you should go ahead with the public.
Step 6: Now that you've identified your target audience, tell them about your live video. You can accomplish this by including a description in your live video. To add a description, tap on the text area.
Step 7: By clicking on the icons next to the text area, you can tag people, add a location, or add an activity to your live video. You can also add fun filters and effects to your live video by tapping the wand icon next to the "Start Live Video" button.
To practice before your public live stream, try out these filters and effects on an actual live stream with the view restricted to "Only Me."
Step 8: You are now ready to go live on Facebook from your mobile device. When you press the "start live video" button, Facebook will give you a countdown of "3, 2, 1… "and you will be streaming live from your mobile device!
Step 9: Once you're live, you should encourage your audience to participate in the chat as freely as possible. During the live, these reactions and comments will appear on your screen, allowing you to interact with them.
Step 10: To end your live stream, click the "finish" button in the bottom right corner. The video will automatically appear on your timeline, where you can save, edit, or delete it as you would any other Facebook post-just like a regular Facebook Live video.
3. How Do You Stream Live on Facebook From Your Computer?
Mobile live-streaming is fantastic, but if you want a more professional experience, you should consider doing it on a desktop computer.
Step 1: Open your Facebook page on your computer and click the "live" button next to the "create" option on your profile page.
Step 2: Facebook has added a couple of new options for computer streaming. The Facebook live stream key allows you to bypass the usual checklist that must be completed before beginning a live stream. It is an excellent choice for publishers, businesses, and influencers who frequently use Facebook Live.
Step 3: Just like with your mobile live stream, add a description to your live video. You can also include a location, an activity, and tags in your live video.
Step 4: Customize your audience by deciding who will be able to see your live video.
Step 5: When you're finished with the live stream, click "finish" to end the broadcast.
The live video will be automatically saved to your timeline, where you can edit it, create a separate post from it, or even delete it, just like any other post on Facebook.
What Is The Best Way To Go Live In A Facebook Group?
You can go live from your Facebook group and page in the same way that you can from your profile. Simply go to the group or page from which you want to stream and tap on the 'Write Something' button on the wall (this is where you usually create a post).
You will then be given the option to go live; simply tap on it, and you are now ready to go live. The audience for your live stream will be set automatically for the group or page from which you are streaming live.
How Do You Save Facebook Lives For Later?
You can schedule a live stream on Facebook up to one week in advance. You can also notify your audience about the upcoming stream. Here's how to schedule your Facebook live stream for specific days or even just a specific time of week.
Step 1: Go to your Facebook page and begin setting up your live stream as described in the previous section. On your left, you'll see a scheduling option for your live stream. Select that option.
Step 2: You'll now see an option to schedule your live stream, which will be displayed in your announcement post. You can now customize your live video in the same way that you would a regular live video, such as adding a description, selecting your audience, and so on.
Step 3: You can also choose an image to go with your live stream announcement post. According to Facebook, the ideal image ratio is 1.9:1.
Step 4: Once all of the fields have been completed, there will be a "schedule live video" button at the bottom of the page that will turn blue, indicating that the stream is ready to be scheduled. To schedule your live stream, click on that button.
4. How Do I Publish A Facebook Live Stream To Several Pages?
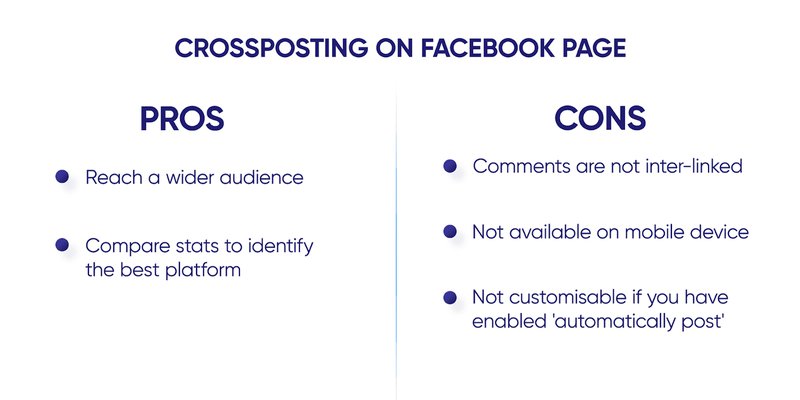
The Cross-Posting feature on Facebook Live allows you to reach a larger audience. You can use this feature to distribute a single broadcast across multiple pages. To be able to crosspost your live video from multiple pages, you must first connect the pages from which you want to stream.
Step 1: Go to your Facebook page and click the "settings" button in the upper right corner of the screen.
Step 2: From the left column, select the option for "cross posting," and then select the page you want to crosspost from the list that appears.
Step 3: To manage crossposting permissions, you have two options. If you select the "automatically post" option, your live streams will be posted on both your Facebook and Twitter pages. Before a crosspost can begin, it must be approved by an admin or editor.
Remember that the pages you've linked to must confirm your request before you can use their content on the other site's social media sites.
How Do I Enable Crossposting For A Facebook Live Broadcast That I Have Scheduled?
Now that you know how to connect your page to another page in order to crosspost your live stream, let us show you how to enable this feature for scheduled live streams.
Step 1: After scheduling your Facebook live stream using the steps outlined in the preceding sections, locate the three dots in the upper right corner of your scheduled live video and select Edit Post.
Step 2: In the settings section, there is a crossposting option. You have the option of crossposting to multiple pages. When you're finished, click "save" to enable your crosspost.
5. How Can You Save Your Facebook Live Video?
You can save your Facebook live videos to your device and repurpose them to create new content. Here's a step-by-step guide to downloading a Facebook live video from your page, profile, or group.
Step 1: When your Facebook live video concludes, it will be added to your timeline as a video post. To view this video in fullscreen mode, click on it.
If it was a previously ended live video, you can find it in your video library. If you have a Facebook group or page, your previous live videos will appear on the main screen tab, eliminating the need to search through all of your video files.
Step 2: In the top right corner, click the '…' button, which will reveal the option to "Download Video." Your screen will auto-refresh to show only your video.
Step 3: Click the three-dotted button again in the top right corner, and then choose "download." Your video will be downloaded to your device.
6. Streaming Multiple Facebook Live Videos at Once
Facebook Live videos can be streamed simultaneously on multiple platforms. There are several benefits to using a simple multistreaming option that allows you to feature on multiple live streaming platforms such as YouTube, Instagram, Facebook, Linked In, and others.
Using this option has a number of advantages. Here are a few that came to mind:
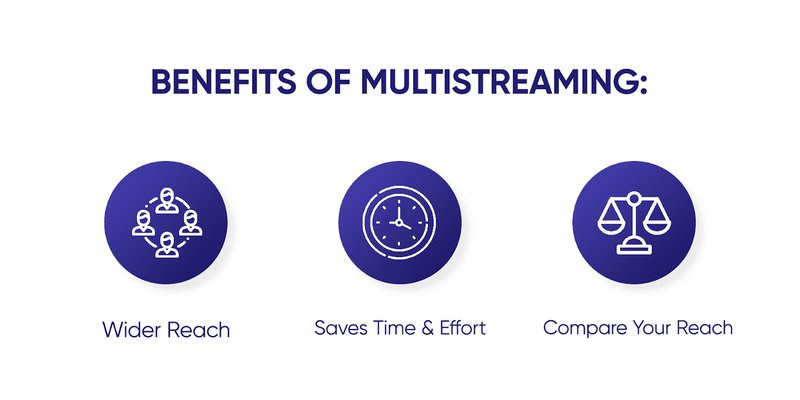
- Wider Reach: Streaming on YouTube, Facebook, Instagram, and LinkedIn at the same time allows you to reach a much larger audience. If your content is good, viewers will quickly become fans of your brand on various social media platforms.
- Saves Time and Effort: With multistreaming, you can do a one-hour live stream on all three platforms at the same time. This saves you a lot of time and effort, which you can put to better use in other areas like email and social media marketing or web development. It also means you won't be spending three hours a day doing the same thing over and over.
- Compare Your Reach: When multistreaming, you can see insights about your viewership across all platforms at the same time. This allows you to compare your reach across platforms and gain insights into where your reach is strongest. Once you have this information, you can eliminate the low-performing platforms and concentrate on streaming your content on platforms with a larger reach.
The platform you choose determines whether or not multistreaming will benefit your brand. For example, if you are a gamer who streams your gameplay live on Twitch, you might want to reconsider. Based on your product and demographic, your audience determines which platform becomes your primary platform.
7. How Do I Get Started With Facebook Live Streaming?
For you to be able to do a good livestream, you must meet some minimum requirements. The setup is critical for making any live video look appealing and professional to your viewers. Continue reading to learn how to set up your Facebook Live stream.
A. Good Processing Power
A live stream could be the most taxing on your computer, even more so than video editing. As a result, you must ensure that you have a computer that is up to the task and has the necessary specs to support a live stream. Because of their insane processing power, gaming computers are usually a great choice. We recommend a Quad-Core Intel® i5 (6th Generation) processor with at least 8 GB of RAM for live streaming. Anything with a better configuration will simply make things easier and smoother.
B. Stable Internet Connection
Most broadcasters understand the importance of network connections in producing high-quality live videos. As a result, one of the most frequently asked questions is about the minimum internet speed required to stream smoothly. There is no single answer, and it all boils down to the resolution at which you intend to stream.
C. Camera
A good webcam or a good DSLR will cost you between $800 and $1000. If you only need professional-quality video and don't have the money, a webcam is the way to go. However, if you're just getting started with a webcam, we don't recommend spending money on one right now.
D. Audio
If you don't have a lot of time, energy, or money to devote to live streaming, it's best to focus all of your efforts on getting high-quality audio. Most people will go overboard with the audio setup, including a high-quality microphone and audio mixer.
E. Lighting
The look and feel of your live stream will differ greatly depending on who you are. Investing in lighting will provide you with uniform and even light distribution across the entire frame of the shot. We strongly advise you to remove your glasses for the duration of the video.
F. Background
After you've set up the lights, camera, audio, and audio, you should consider the background. This is one of the most important aspects of your video and one of the most difficult to get right. It creates the environment in which you want your audience to be.
8. 10 Useful Facebook Live Streaming Tips
For those interested in experimenting with Facebook Live Streams, it is natural to ask the difficult question, "What should you make a live stream of?" We've compiled a list of ten simple ideas to get you started:
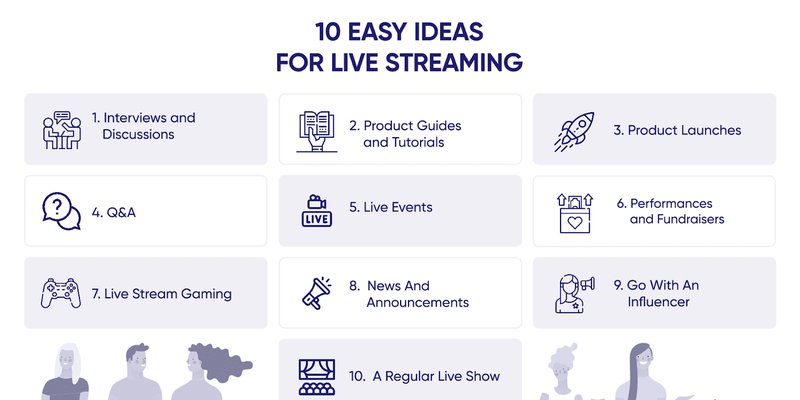
9. 10 Facebook Live Tips to Help You Create Professional Facebook Lives
Tip No. 1: Interact With Your Audience
The whole point of going live is to interact with your audience in real time. You can make several small gestures to engage with those who watch your Facebook live video, such as addressing those who join in early and asking them where they are from, reading out interesting comments, and answering questions by addressing the viewer with their first name.
Tip No. 2: Pin Excellent Comments to the Top of the Chart.
Don't forget to pin it if a viewer has left a great comment or asked an engaging question that may start a conversation and increase interaction with others on the live video. Because a pinned comment is the first one that people see and read, you can pin your own comment that informs your audience about the live stream, redirects them to links, or cues them to interact with you.
Tip No. 3: Encourage event attendees to interact with the live audience.
If you're live streaming from an event on Facebook, you can share the experience with your audience more effectively by allowing them to interact with the attendees. For example, if it is a performance-based event, you can take your audience backstage and live stream interviews with the performers, and you can also create vox-pop content, which is essentially talking to people at the event and asking them questions about their experience. This will give your audience a much better sense of the event than simply showing a live stream of the performance.
Tip No. 4: Inform people when you will be broadcasting so they can participate.
When you schedule a live broadcast and inform your audience about it, those who are interested will make an effort to participate, and many will even share it with their friends. You can also promote a scheduled live on Facebook groups that you are a member of, as well as on your other social media channels.
Tip No. 5: Use Proper Lighting (Shoot Near A Window, Not In Front Of It)
While we have already discussed lighting solutions, we want to emphasize why it is critical for you to be well-lit during your Facebook live. If you don't want to buy a ring light right away, simply position yourself near a window so that natural light falls on your face and body. Sitting in front of the window will result in a very bright backlight, which will not make for a pleasant viewing experience. For example, this would be an excellent place to live.
Tip No. 6: Do practice live videos.
You can practice going live on Facebook by leaving the live viewership open with the privacy setting "Only to me." When you click to begin a live video, you will be given this option. This will allow you to do a couple of practice runs before the real thing. These videos can be used to test your lighting solution, audio, and content delivery.
Tip No.7: Leave Your Audience With A Call-To-Action
When people join your live stream, it's usually to see what you're up to or to learn something from you–this shows that they're interested in you and your content. You must take advantage of this opportunity to re-direct them by issuing a call to action. You can ask them to sign up for your weekly newsletter, follow you on Instagram for daily updates, enroll in your course, or purchase a product you recommend or sell.
Tip No. 8: Add A Custom Thumbnail To Your Live Video
You can now add a custom thumbnail to your Facebook live video.
10. How Do You Analyze And Iterate On Facebook Live?
So you've finished your live stream setup and are ready to go live at any time, but how do you analyze the performance of your live stream? Facebook, on the other hand, has you covered. They have a feature called "Page Insights" that allows you to track a variety of metrics for all of your content.
Through Facebook's analytics tool, you can track your post's performance and see how many people saw your live stream, commented on it, shared it, and more.
By using Facebook's video engagement statistics, you can see which livestreams received the most engagement from your viewers. Engagement refers to any type of action taken by your viewers on your video, such as commenting, reacting, or sharing. Your viewer retention metrics can be extremely useful.
Final Thoughts
The most significant impediment to doing a live stream is you. Let go and begin today—with what you have and build as you go. Facebook has made it easier than ever to get started, but it is up to you to press the start button.
Source: Invideo

